> ## Documentation Index
> Fetch the complete documentation index at: https://docs.genloop.ai/llms.txt
> Use this file to discover all available pages before exploring further.
# Connect a database
> Connect a database to Genloop: grant network access, enter credentials or an SSH tunnel, select tables, and generate memory your team can query in natural language.
Genloop connects to your database with read-only access and builds queryable memory from the tables you select. It reads from your source directly, without copying or moving your data.
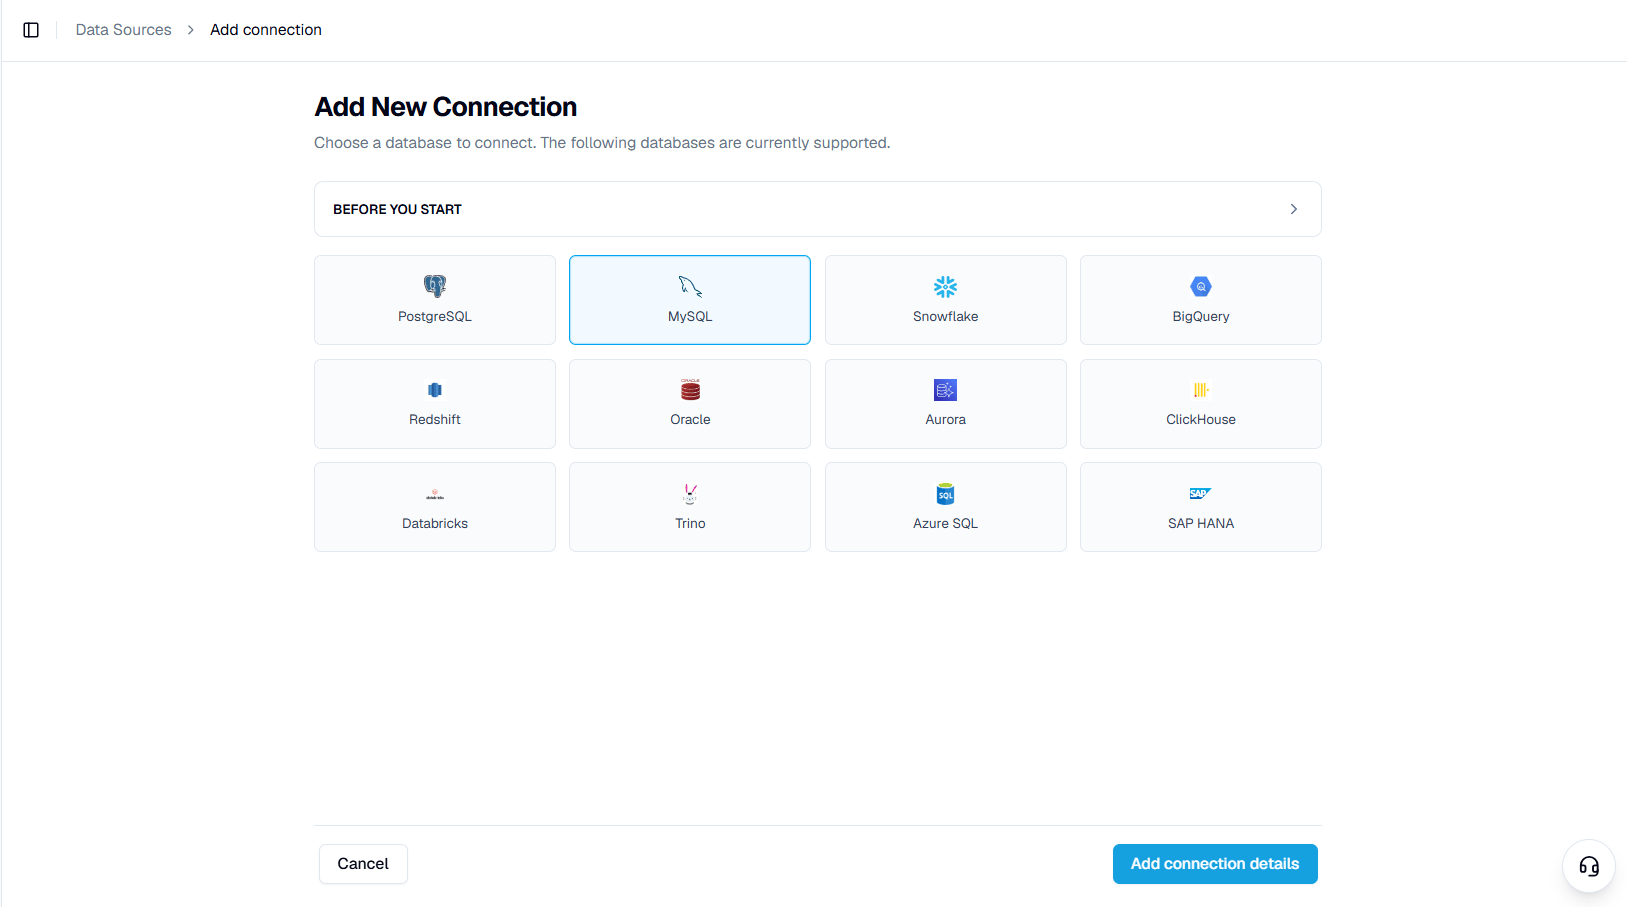
Supported engines: PostgreSQL, MySQL, Snowflake, BigQuery, Redshift, Oracle, Aurora, ClickHouse, Databricks, Trino, Azure SQL, and SAP HANA.
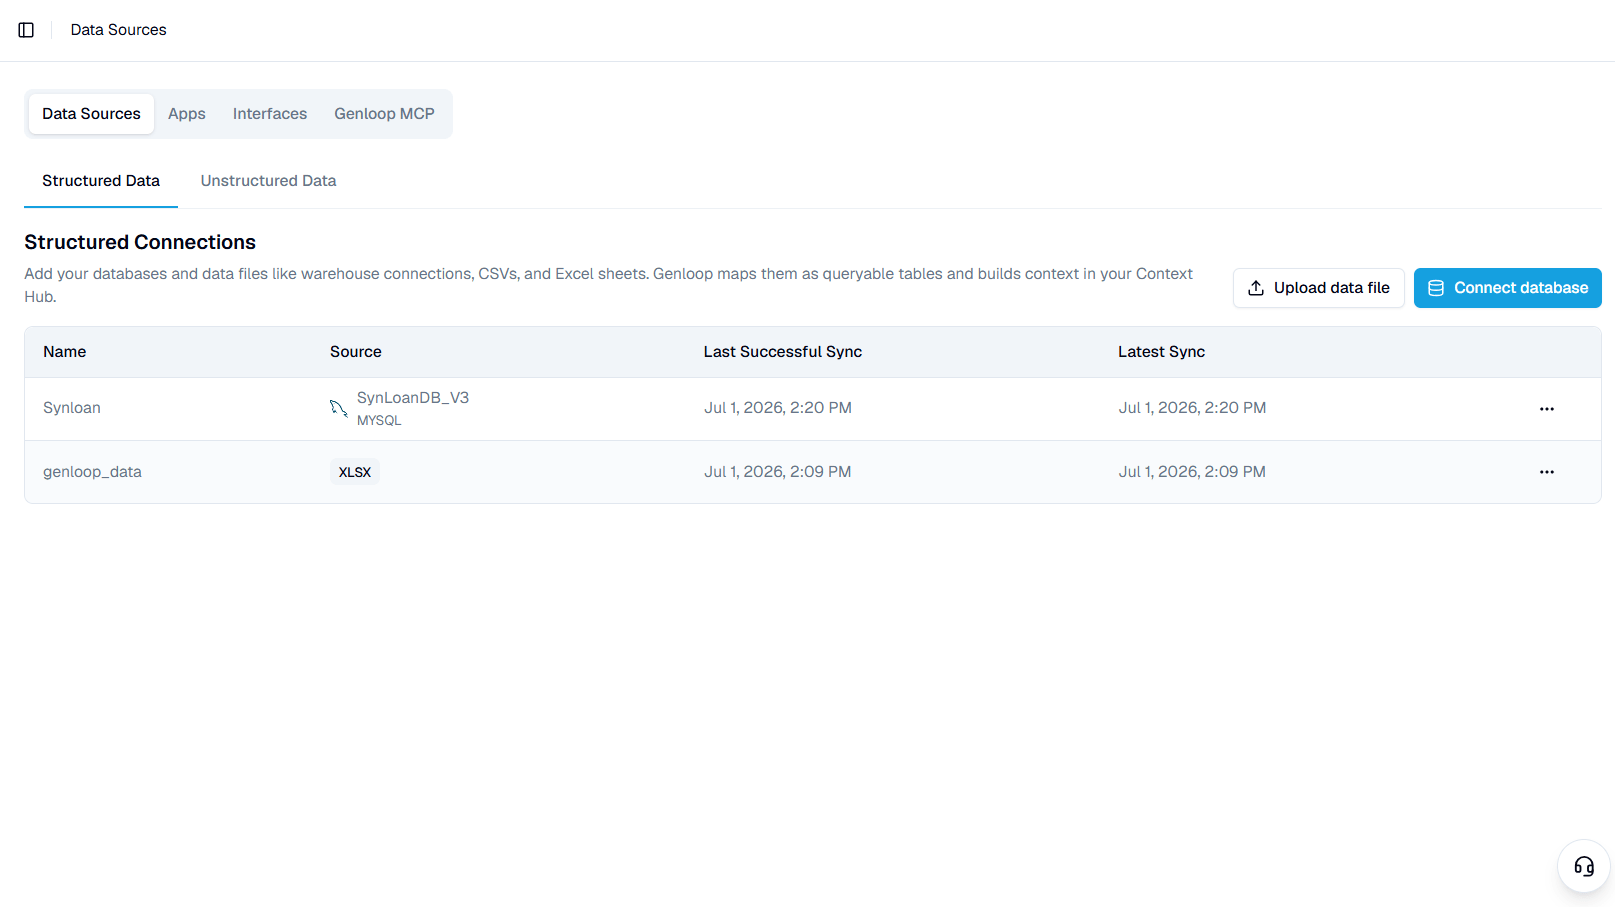
Open the **Structured Data** tab and click **Connect database** to begin.
 ## Before you begin
The **Add New Connection** screen opens with a **Before you start** panel. Both steps below are optional. Complete them only if they apply to you.
## Before you begin
The **Add New Connection** screen opens with a **Before you start** panel. Both steps below are optional. Complete them only if they apply to you.
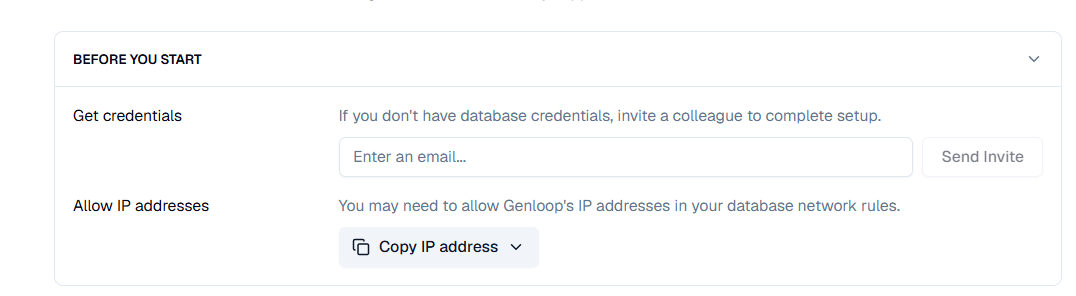 **If you do not have the credentials**, enter a colleague's email under **Get credentials** and click **Send Invite**. They can open the connection and complete the setup for you.
**If your database is behind a firewall**, click **Copy IP address**, select your region, and add the address to your database's inbound rules. Skip this step if your database already accepts connections from any IP address.
| Region | IP address |
| ------------ | -------------- |
| `us-east-1` | `52.21.2.252` |
| `ap-south-1` | `13.233.59.14` |
## Connect your database
Select your engine from the supported list, then click **Add connection details**.
**If you do not have the credentials**, enter a colleague's email under **Get credentials** and click **Send Invite**. They can open the connection and complete the setup for you.
**If your database is behind a firewall**, click **Copy IP address**, select your region, and add the address to your database's inbound rules. Skip this step if your database already accepts connections from any IP address.
| Region | IP address |
| ------------ | -------------- |
| `us-east-1` | `52.21.2.252` |
| `ap-south-1` | `13.233.59.14` |
## Connect your database
Select your engine from the supported list, then click **Add connection details**.
 Name the connection, confirm the **Data Source**, and complete the fields for your database.
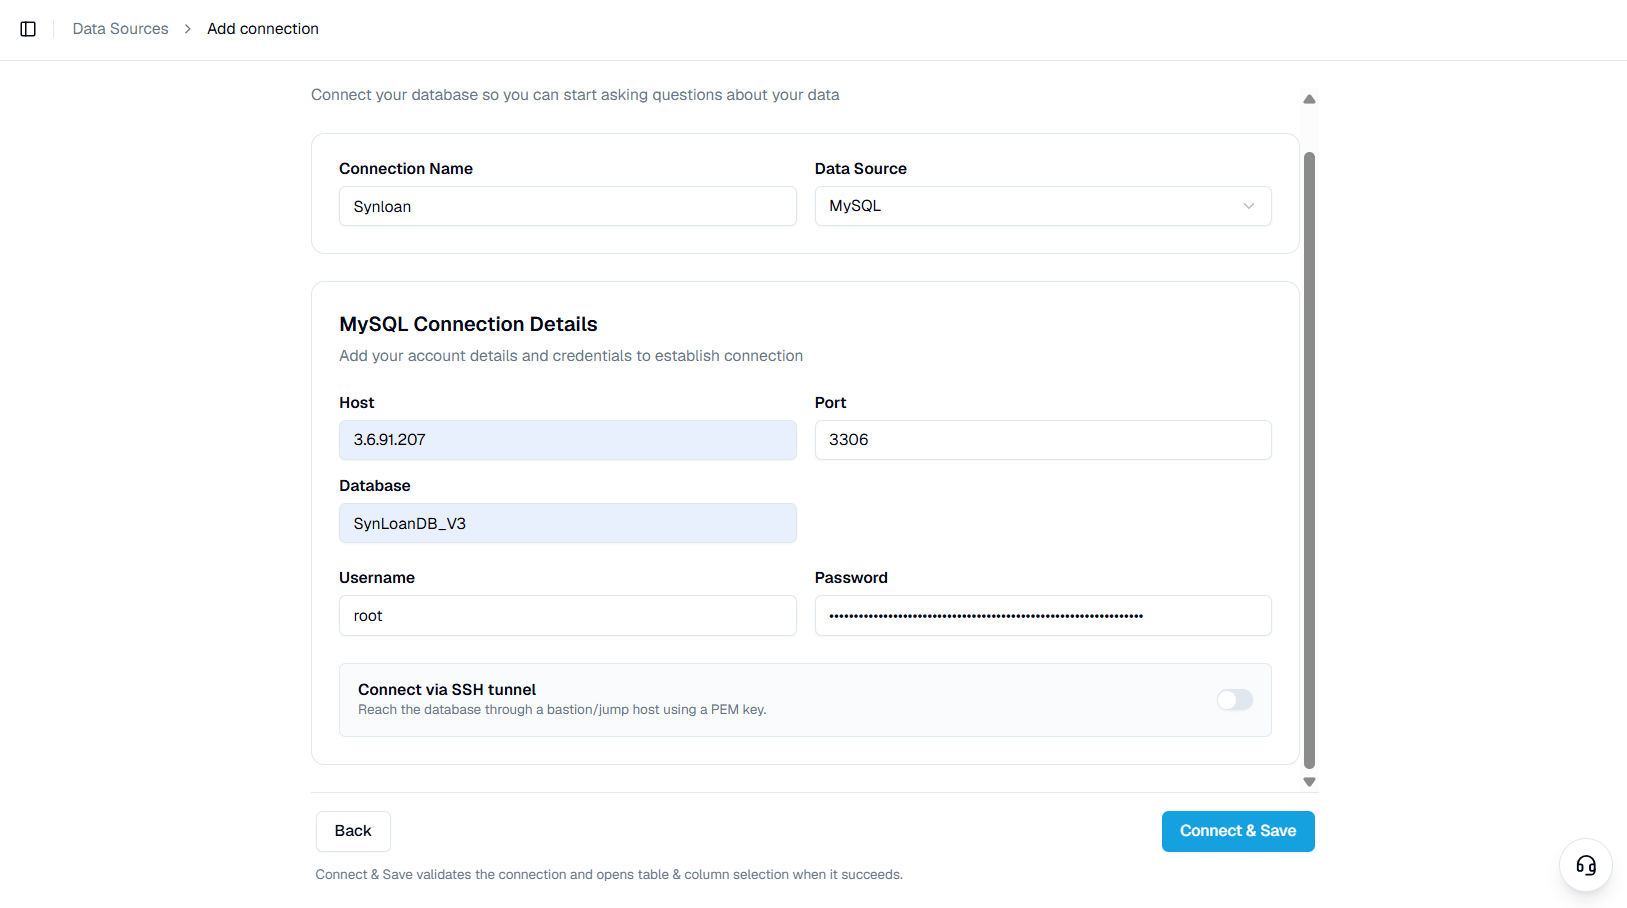 | Field | Description |
| ------------ | -------------------------------------------------------------- |
| **Host** | Hostname or IP address of your database server |
| **Port** | Port your database listens on. Each engine has its own default |
| **Database** | Name of the database to connect |
| **Username** | User Genloop connects as |
| **Password** | Password for that user |
The connecting user needs read access only. Genloop never writes to your source. Field names and defaults vary by engine — see the [database guides](/using-genloop/connections/databases/mysql) for yours.
If you reach the database through a bastion or jump host, enable **Connect via SSH tunnel** and complete the tunnel fields.
| Field | Description |
| ------------ | -------------------------------------------------------------- |
| **Host** | Hostname or IP address of your database server |
| **Port** | Port your database listens on. Each engine has its own default |
| **Database** | Name of the database to connect |
| **Username** | User Genloop connects as |
| **Password** | Password for that user |
The connecting user needs read access only. Genloop never writes to your source. Field names and defaults vary by engine — see the [database guides](/using-genloop/connections/databases/mysql) for yours.
If you reach the database through a bastion or jump host, enable **Connect via SSH tunnel** and complete the tunnel fields.
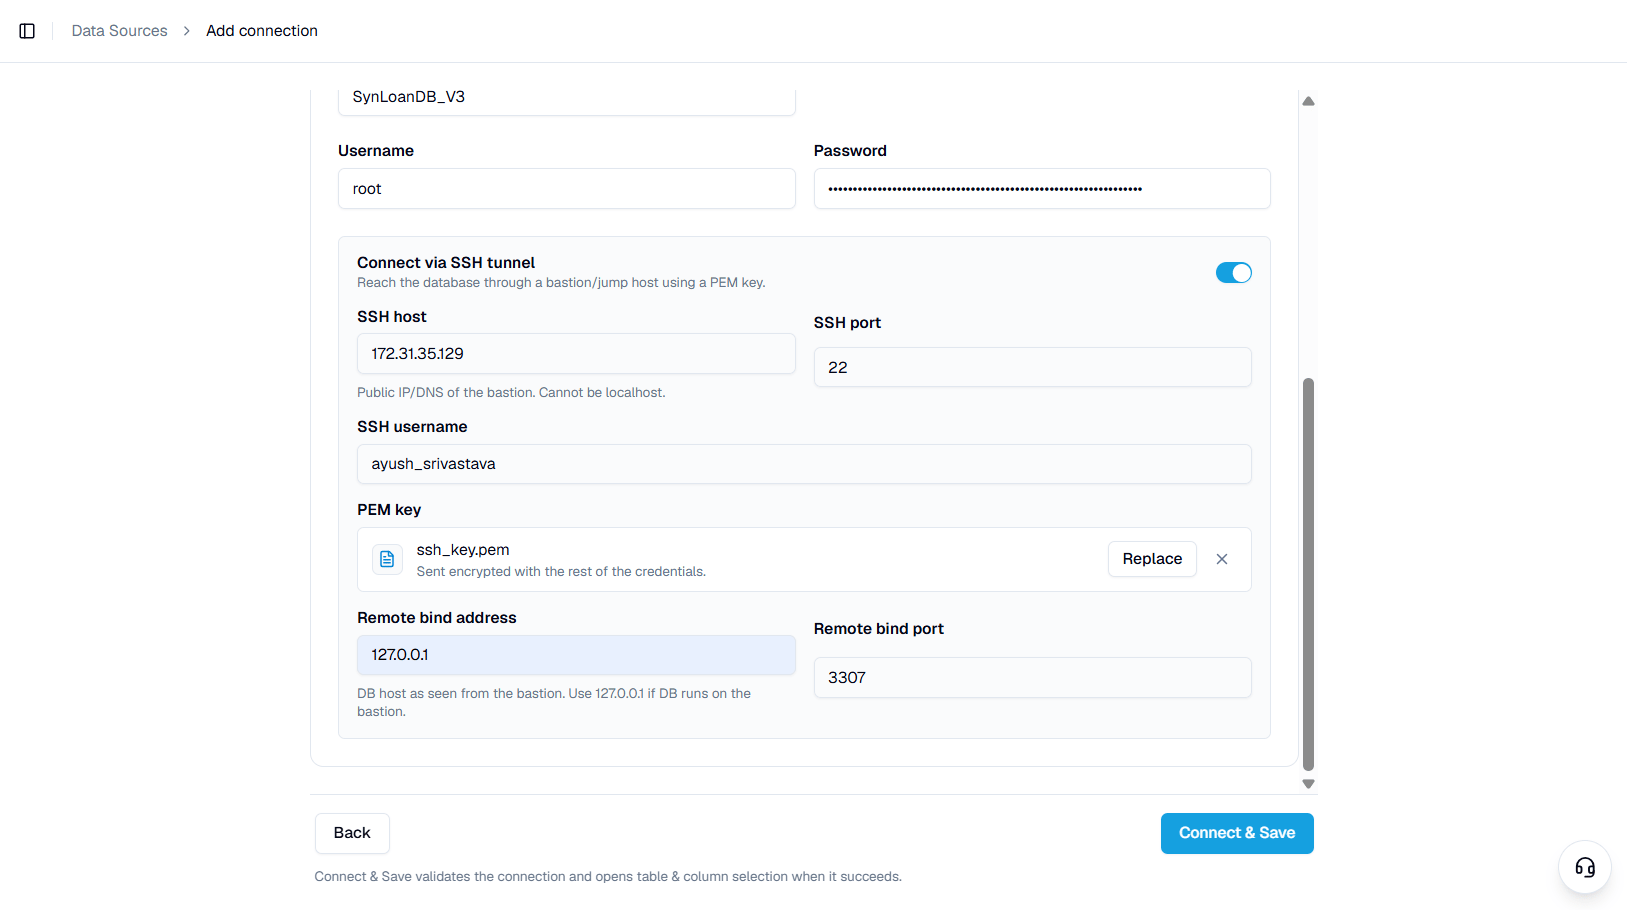 | Field | Description |
| ----------------------- | ------------------------------------------------------------------------------------------- |
| **SSH host** | Public IP or DNS of the bastion. Cannot be `localhost` |
| **SSH port** | SSH port on the bastion. Default is `22` |
| **SSH username** | User Genloop signs in to the bastion as |
| **PEM key** | Your private key file. Sent encrypted with the rest of the credentials |
| **Remote bind address** | Database host as seen from the bastion. Use `127.0.0.1` if the database runs on the bastion |
| **Remote bind port** | Database port as reached from the bastion |
Click **Connect & Save**. Genloop validates the connection and opens table selection when it succeeds. A failed validation names the exact problem to fix, usually a credential, a port, or an IP address that still needs to be allowed.
Choose the tables and columns to build memory on. Select a table to view its columns, and use **Select all** or **Clear** to adjust. Start with the tables that answer your team's most common questions; you can add more later. The footer totals your selected **Tables**, **Columns**, and **Workspace Tables** against your plan limit.
| Field | Description |
| ----------------------- | ------------------------------------------------------------------------------------------- |
| **SSH host** | Public IP or DNS of the bastion. Cannot be `localhost` |
| **SSH port** | SSH port on the bastion. Default is `22` |
| **SSH username** | User Genloop signs in to the bastion as |
| **PEM key** | Your private key file. Sent encrypted with the rest of the credentials |
| **Remote bind address** | Database host as seen from the bastion. Use `127.0.0.1` if the database runs on the bastion |
| **Remote bind port** | Database port as reached from the bastion |
Click **Connect & Save**. Genloop validates the connection and opens table selection when it succeeds. A failed validation names the exact problem to fix, usually a credential, a port, or an IP address that still needs to be allowed.
Choose the tables and columns to build memory on. Select a table to view its columns, and use **Select all** or **Clear** to adjust. Start with the tables that answer your team's most common questions; you can add more later. The footer totals your selected **Tables**, **Columns**, and **Workspace Tables** against your plan limit.
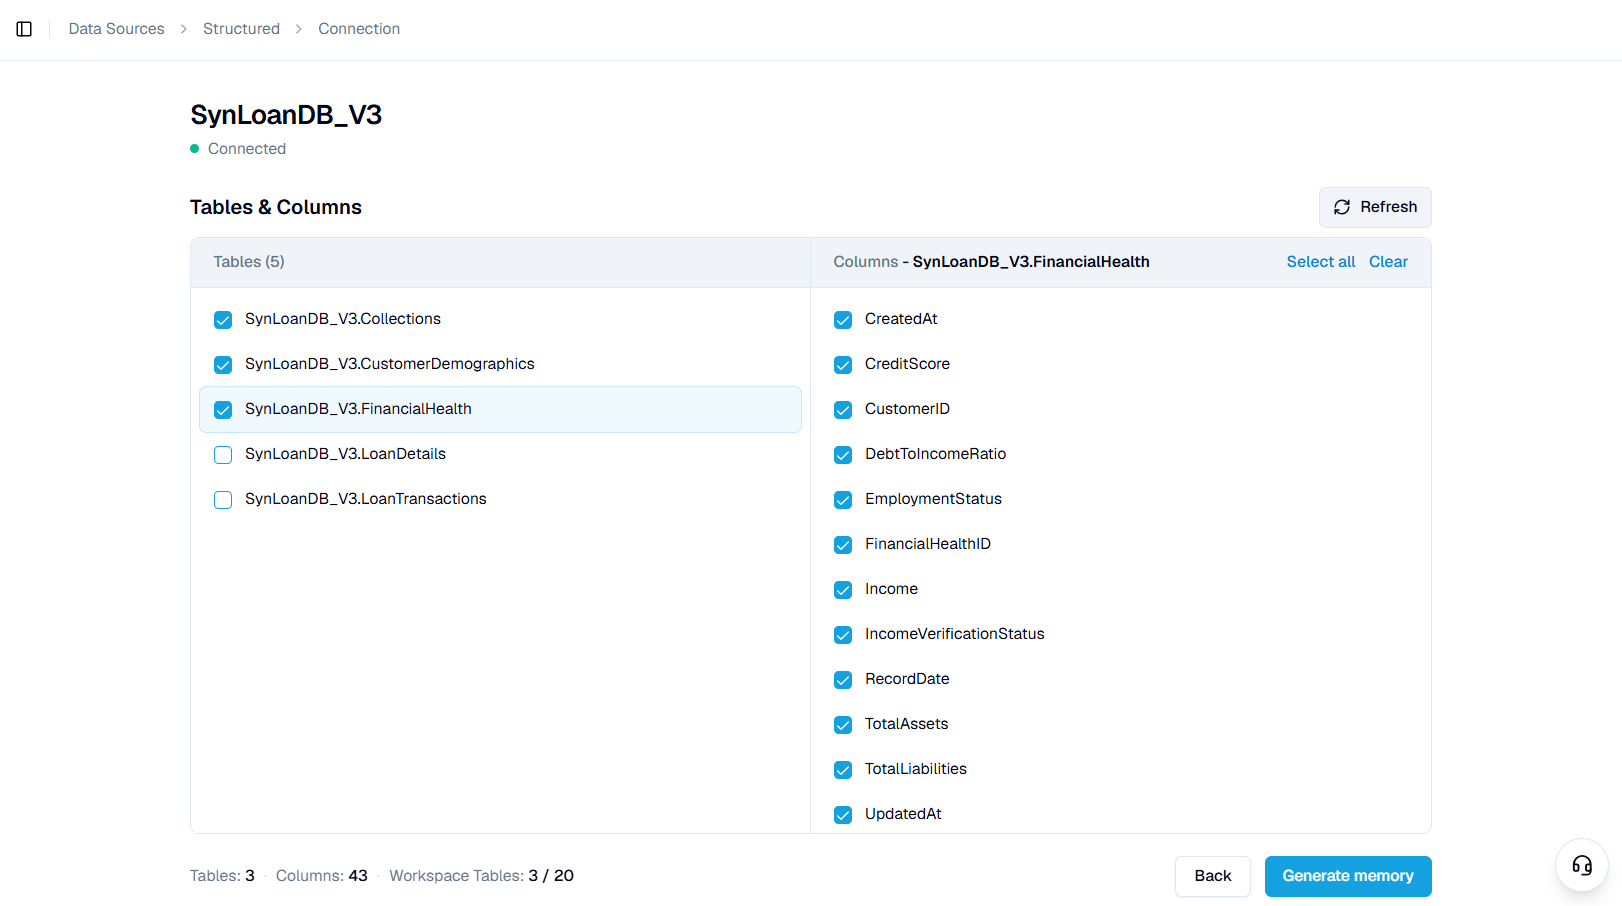 Click **Generate memory**. Genloop builds the semantic context: column descriptions, table relationships, and business meaning. Progress appears as each stage completes. When it finishes, the connection is live and ready to query in Chat.
## Keep tables in sync
Schemas change as tables and columns are added or dropped. Open a connection and click **Refresh** to re-read the live schema. Genloop detects the drift and shows what changed, so your selection stays aligned with the database.
## Add more tables later
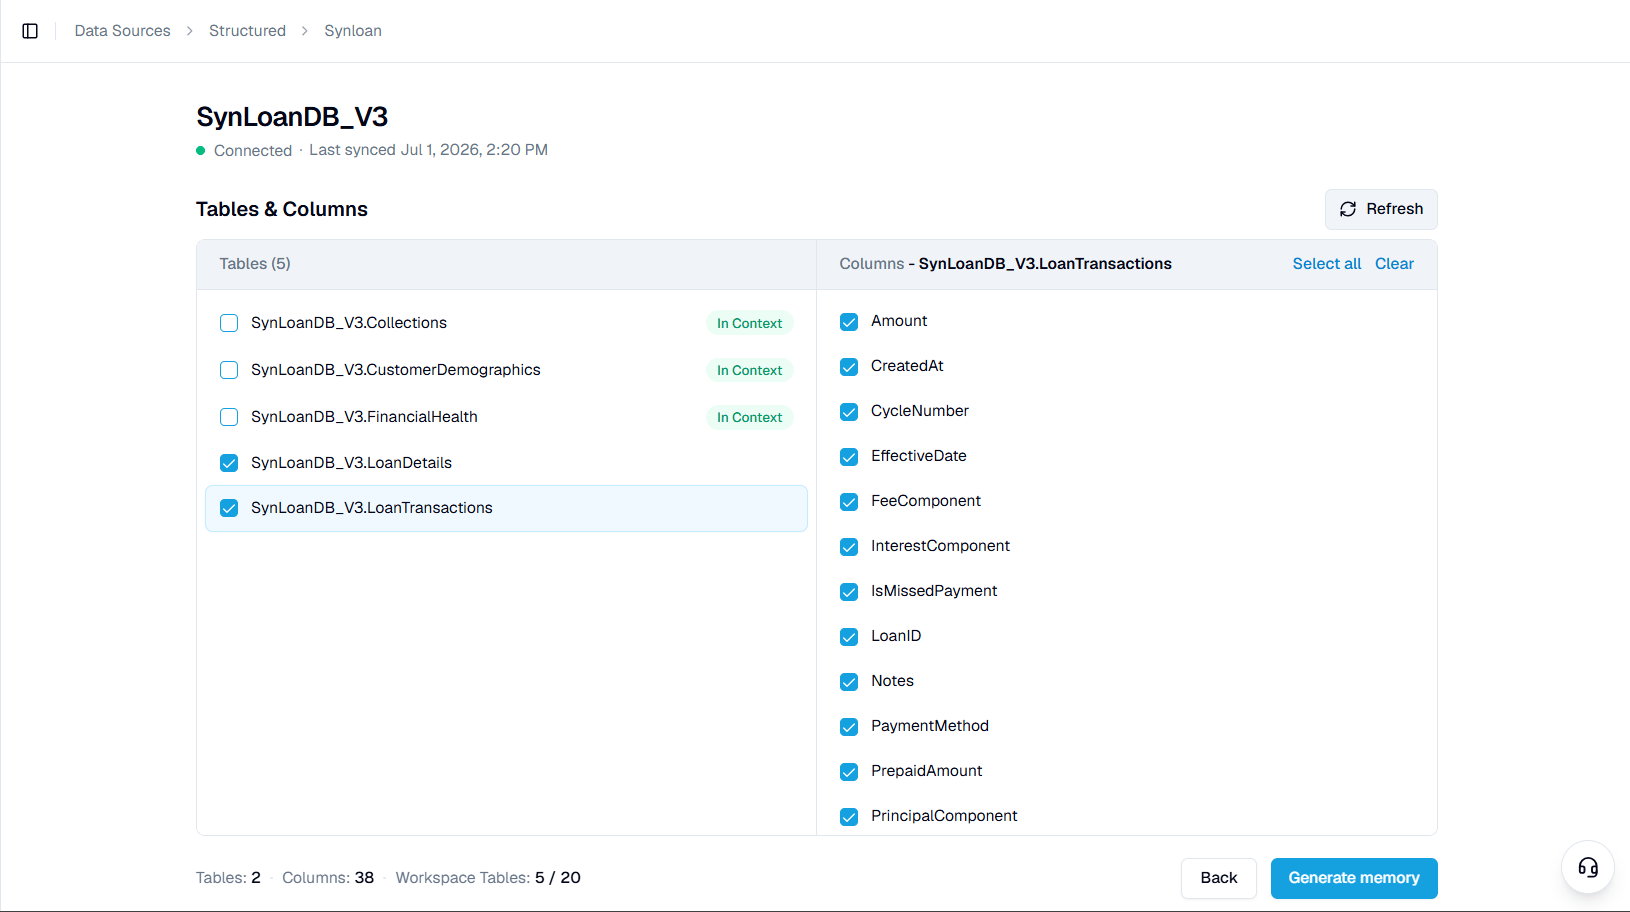
Onboard in stages. Tables that already have memory show an **In Context** badge. To add tables you skipped, reopen the connection, select the remaining tables or columns, and click **Generate memory**. Genloop processes only the new selection and leaves your existing memory unchanged.
Click **Generate memory**. Genloop builds the semantic context: column descriptions, table relationships, and business meaning. Progress appears as each stage completes. When it finishes, the connection is live and ready to query in Chat.
## Keep tables in sync
Schemas change as tables and columns are added or dropped. Open a connection and click **Refresh** to re-read the live schema. Genloop detects the drift and shows what changed, so your selection stays aligned with the database.
## Add more tables later
Onboard in stages. Tables that already have memory show an **In Context** badge. To add tables you skipped, reopen the connection, select the remaining tables or columns, and click **Generate memory**. Genloop processes only the new selection and leaves your existing memory unchanged.
 ## Remove a connection
Connections appear in the **Structured Data** tab with their source, last successful sync, and latest sync time. Open the **⋯** menu on a row to manage it.
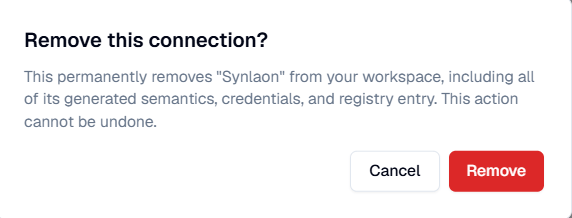
Removing a connection is permanent. It deletes the connection and everything derived from it, including generated semantics, stored credentials, and its registry entry. To pick up schema changes without losing memory, use **Refresh** instead.
## Remove a connection
Connections appear in the **Structured Data** tab with their source, last successful sync, and latest sync time. Open the **⋯** menu on a row to manage it.
Removing a connection is permanent. It deletes the connection and everything derived from it, including generated semantics, stored credentials, and its registry entry. To pick up schema changes without losing memory, use **Refresh** instead.
 ## Next steps
Field-by-field setup for your specific database.
Add CSV or Excel files alongside your database.
View and edit the memory Genloop built from your connection.
Add business documents that inform Genloop's answers.
## Next steps
Field-by-field setup for your specific database.
Add CSV or Excel files alongside your database.
View and edit the memory Genloop built from your connection.
Add business documents that inform Genloop's answers.